For us, E.V. stands for "Egli-Vincent"… not "Electric Vehicles"!
How to build a Banana tank
Find the perfect tank for this Egli project would not have been not impossible, but when a craftsman capable to execute exactly what you want turns out to be one of your friend, why bother shopping around?
Swenchopper Kustom Bikes provided a few pictures describing the process to build this banana tank. As the finish will be polished, the surface of the tank had to be perfectly leveled with no dents that could not be hidden later with some filler. The craftsman was Laurent Jeanmonot from Gost kustom. He built it from pictures and drawing supplied by Fritz Egli, Swen was speechless when he saw the result!
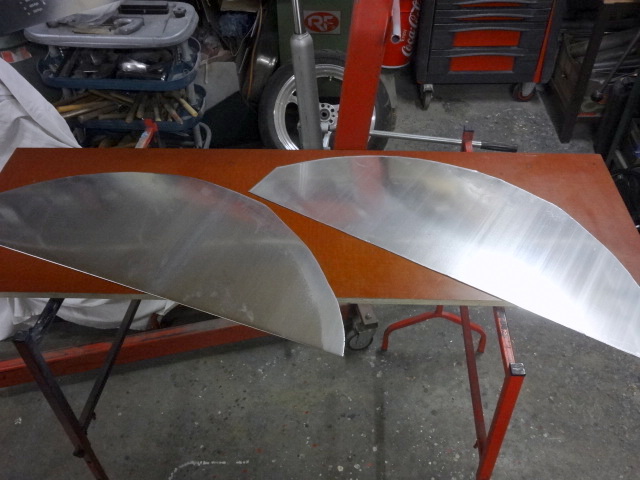
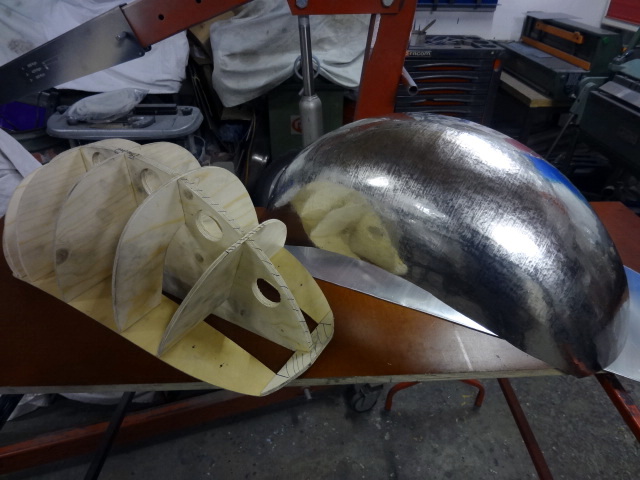
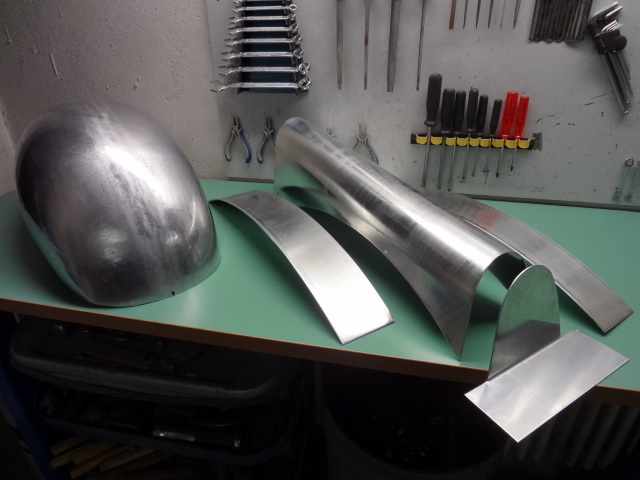
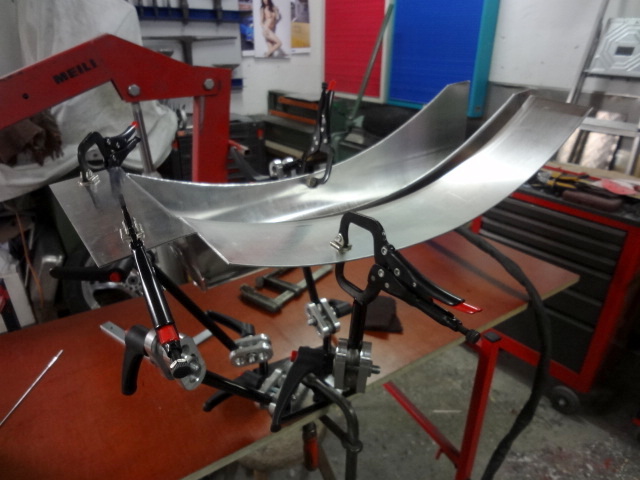
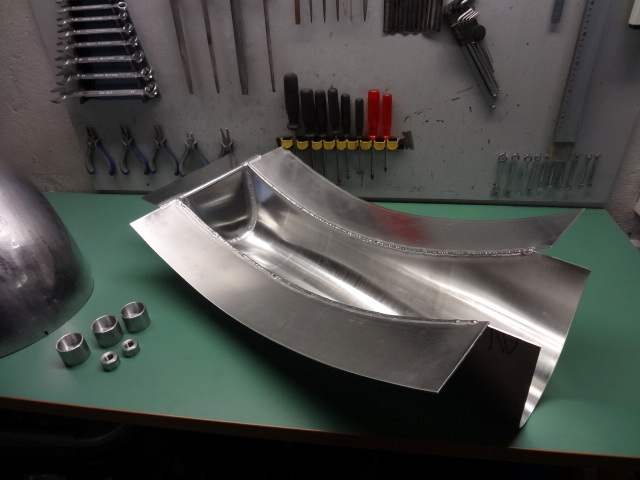
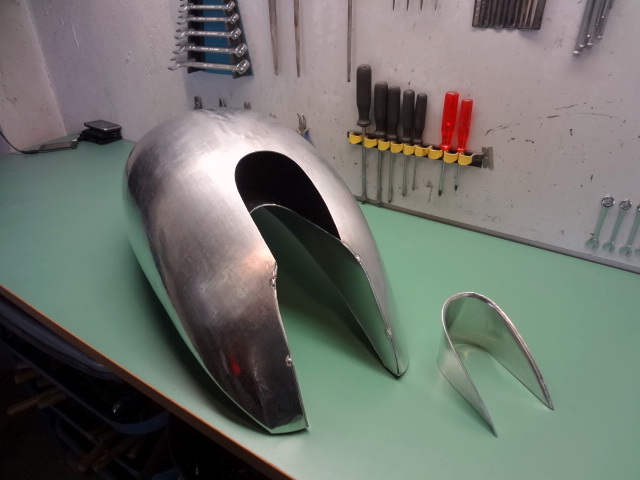
Everything starts here, from flat aluminum sheets that were cut based on the pattern.Then count long, long hours of forming with a mallet and a bench or a Chinese wheel which is a great tool, but you get the point, unless you learnt this process and practiced it, you are likely to end up with a nervous breakdown before long….The two upper half are perfectly shaped to the form.The two upper half are then welded together by the inside. Note the lip on the top that will be grinded in the next step.The pattern and the upper tank. Some craftsmen use a styrofoam form instead.Now it’s time to think about the bottom of the tank to fit the spine frame and the curves of the engine.All these subcomponents are positioned with jigs and welded together.The result after the welding operation, note on the left the sockets that will be used for the gas cap and taps and the silent blocks.The top and the bottom are now positioned together, ready to be welded.the last welding operation will be the triangulated U-shape that you see on the right side, which goes around the oil filler of the spine frame.Fully welded, leak-proofed and polished. Ready to fit the EgliNow fitted on the bike.
Special thanks to Swenchoppers Kustom Bikes which has provided these materials
Hi Simon, Yes the Chinese wheel is another term for the English wheel, which I believe would be more appropriate as Britain was working on bodywork while China had other points of interest. Philippe


Beautiful!!!
Amazing craftsmanship. Well impressed. One of these days ill make my own!
Cool article 🙂
Superb craftsmanship I have a question regarding the Chinese wheel is that anything like an English Wheel or a Wheeling machine??
Hi Simon, Yes the Chinese wheel is another term for the English wheel, which I believe would be more appropriate as Britain was working on bodywork while China had other points of interest. Philippe